DIY Baby Mobile – A Cute and Versatile Project for a Nursery
It's that time of year once again. Summertime! Which, if you're an expecting mother similar I am makes you think of all things crib-related to set up for the upcoming little arrival. Or, summertime just makes everything feel lighter and brighter and fresher. Which makes this DIY mobile a perfect project for a summer afternoon. The terminate result of this simple project is perfectly versatile. It can exist a nursery mobile, an Easter accent, or even a summertime party ornament. Any your needs, you'll want to check out this project!
 View in gallery
 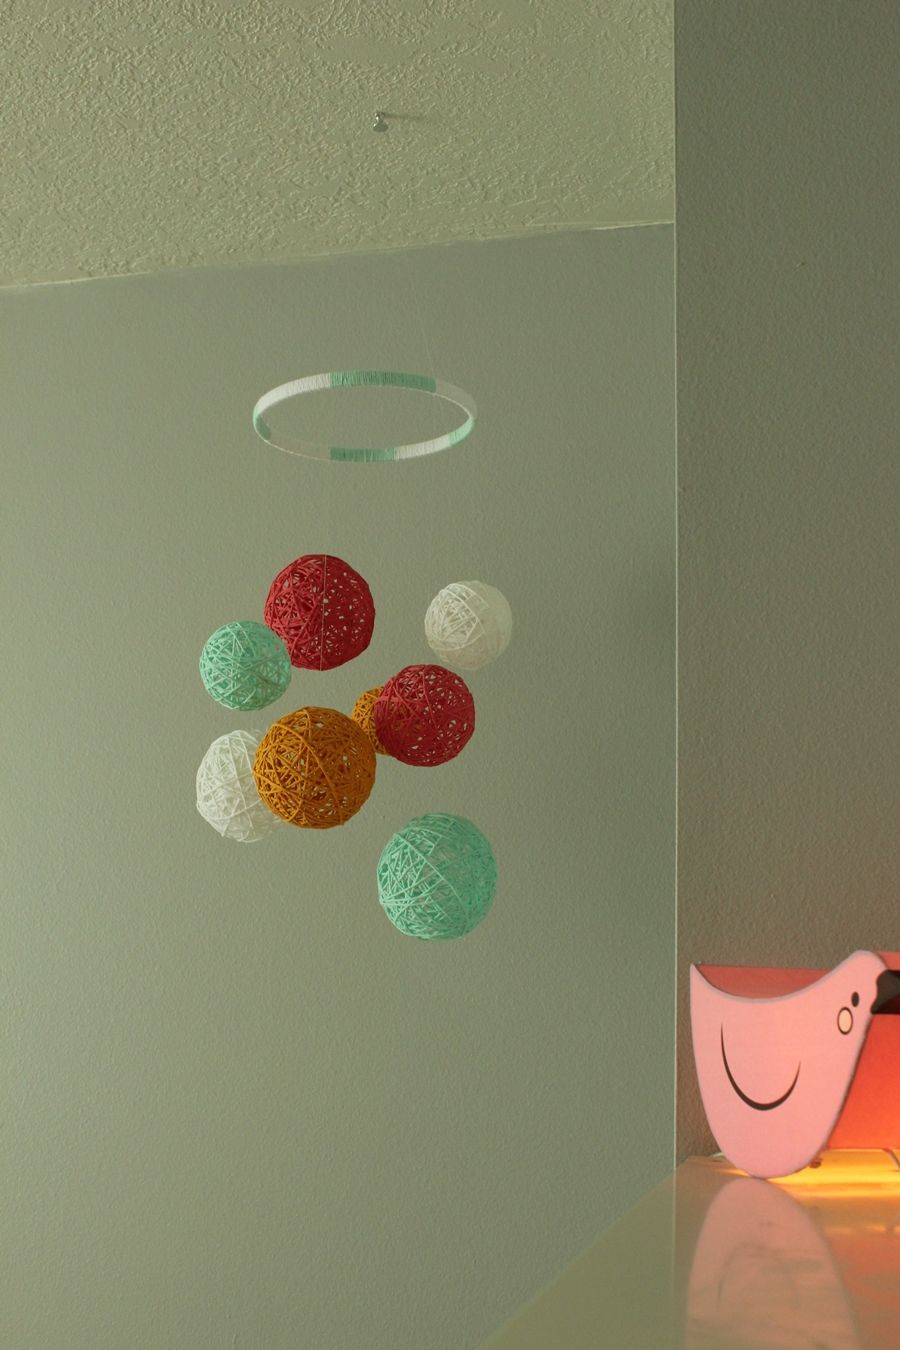 View in gallery
 DIY Level: Beginner
 View in gallery
 Materials Needed:
- Cotton string in colour(s) of your choice
- School gum
- Viii (8) small balloons
- Embroidery hoop
- Angling line (optional)
 View in gallery
 Step i: Accident upwards balloons. Decide the shape of your mobile components – do y'all want them round like a ball or oblong like an egg or raindrop? Then blow upward eight balloons of varying sizes but in like shapes.
 View in gallery
 TIP: To create a round, spherical airship shape (rather than an oblong one), don't blow the airship up very far and force the air further down into the airship by tying off a long "stem." This forces the balloon shape into a sphere.
 View in gallery
 You tin can even change the shape of an already tied balloon (if you're not happy with it) by creating a longer stalk and tying it off again.
 View in gallery
 Hemp Cord Process
Step 2: Beginning the hemp string process by wrapping string around balloon. Hold down the finish of your cord with one finger equally you begin to wrap the string around the balloon itself. Wrap over the costless finish several times to secure it before letting go.
 View in gallery
 When y'all tin let go of the end, rotate the balloon in your hand as you wrap so as to evenly distribute the cord all around it. Continue enough space by the balloon knot to let you to pull the balloon out (later on), but don't make it a gaping pigsty.
 View in gallery
 TIP: To avoid unbalanced, gaping holes, rotate the airship non only effectually sideways in your manus, simply too vertically. Go on rotating and stringing the balloon until yous're satisfied with the wrapping.
 View in gallery
 Footstep iii: Mucilage the cord finish. Cutting your string with the cease near the balloon knot. Dab a little of your school mucilage on nearby strings and secure the end of your string to keep in in identify. Your cord should be snug to keep its shape just non tight to squeeze the balloon out.
 View in gallery
 Footstep 4: Create gluing textile. Pour a bottle of school glue into a container. Fill up the at present-empty gum canteen with water, and add that into the container also.
 View in gallery
 Stir the i:one glue-to-water ratio until you take a smooth consistency.
 View in gallery
 You'll want information technology to exist a bit (or a lot) runny, then aqueduct your inner third grade newspaper mache artiste!
 View in gallery
 Step 5: Utilize the watery glue. Using a soft paintbrush, gently apply the glue onto your cord ball and so that each cord is wet to soaking. You could even curlicue the ball in the glue mixture itself to make sure the inside strings become moisture enough.
 View in gallery
 TIP: Don't be afraid of actually dousing the strings. This is what will give the string ball its contained shape. The mucilage dries clear, and even where it looks like information technology volition class a "window" between the strings (which is not desirable), don't worry. The mucilage won't stick when the balloon is pulled out after on.
 View in gallery
 Footstep 6: Echo for all cord balls, so let dry out. Yous'll want the cord to be fully and absolutely dry out before you mess with them – at to the lowest degree 24 hours, perchance more.
 View in gallery
 TIP: Lay the sticky string balloons on wax paper in a safe place, so rotate every hour or so for the get-go few hours. This volition assistance the gluey mixture to disperse more evenly as it begins to dry.
 View in gallery
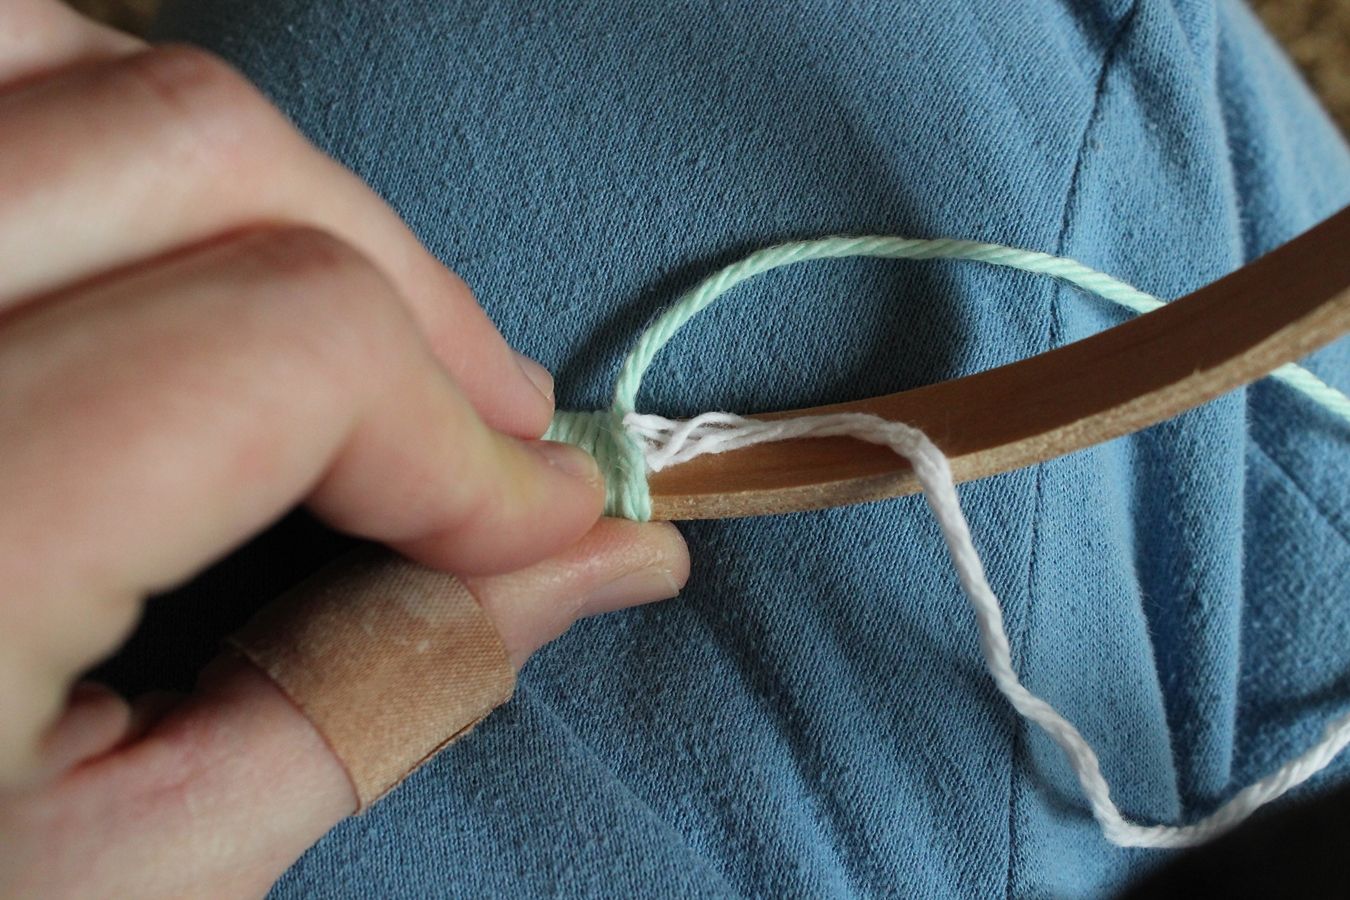
 Step seven: Prepare the mobile hanger. Pull out the inner circle of a medium to large embroidery hoop (instance shows an 8" hoop). You have a few unlike options for this, including painting the wooden embroidery hoop or leaving it natural. For a softer feel, we beloved the look of wrapped cord.
 View in gallery
 To do this easily, cut about a four-foot length of your first string color (A) and tie it securely to the hoop. Begin wrapping tightly, keeping the wrapped strings shut together without gaps. Stop wrapping when y'all have well-nigh 8"-10" of cord left.
 View in gallery
 Cut the aforementioned four-foot(ish) length of your second cord color (B). Place the end of B within the hoop correct adjacent to where you left off wrapping A.
 View in gallery
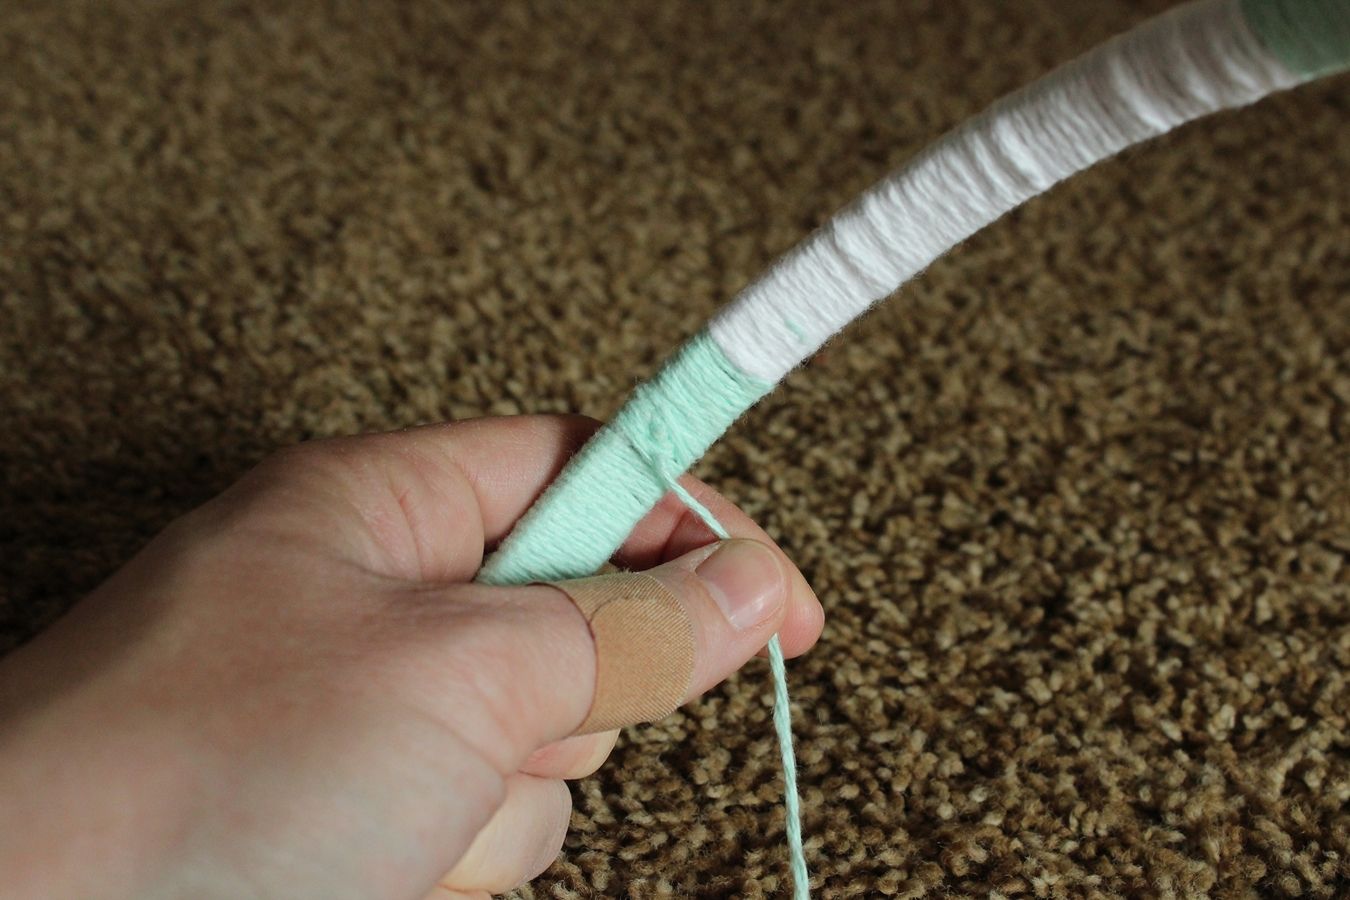
 Proceed wrapping A, over top of B, until it's near at the end.
 View in gallery
 When near 1/ii″ of A is left, hold information technology snugly in the "territory" of B, and now begin wrapping B over top of A.
 View in gallery
 Meet how that transition is nice and seamless? It sounds a fiddling complicated, only once you do it the first fourth dimension, information technology gets easier. TIP: Securing the cord ends this way minimizes the number of knots needed and creates a smoother wrap all the way around.
 View in gallery
 When you lot finish wrapping the entire hoop, tie off the end snugly in a foursquare knot. Trim the extra string.
 View in gallery
 TIP: For good measure, add together a dab of glue to the knot. This not only secures the knot better, but it also helps to contain the stub of string that you've simply trimmed, which sticks out otherwise.
 View in gallery
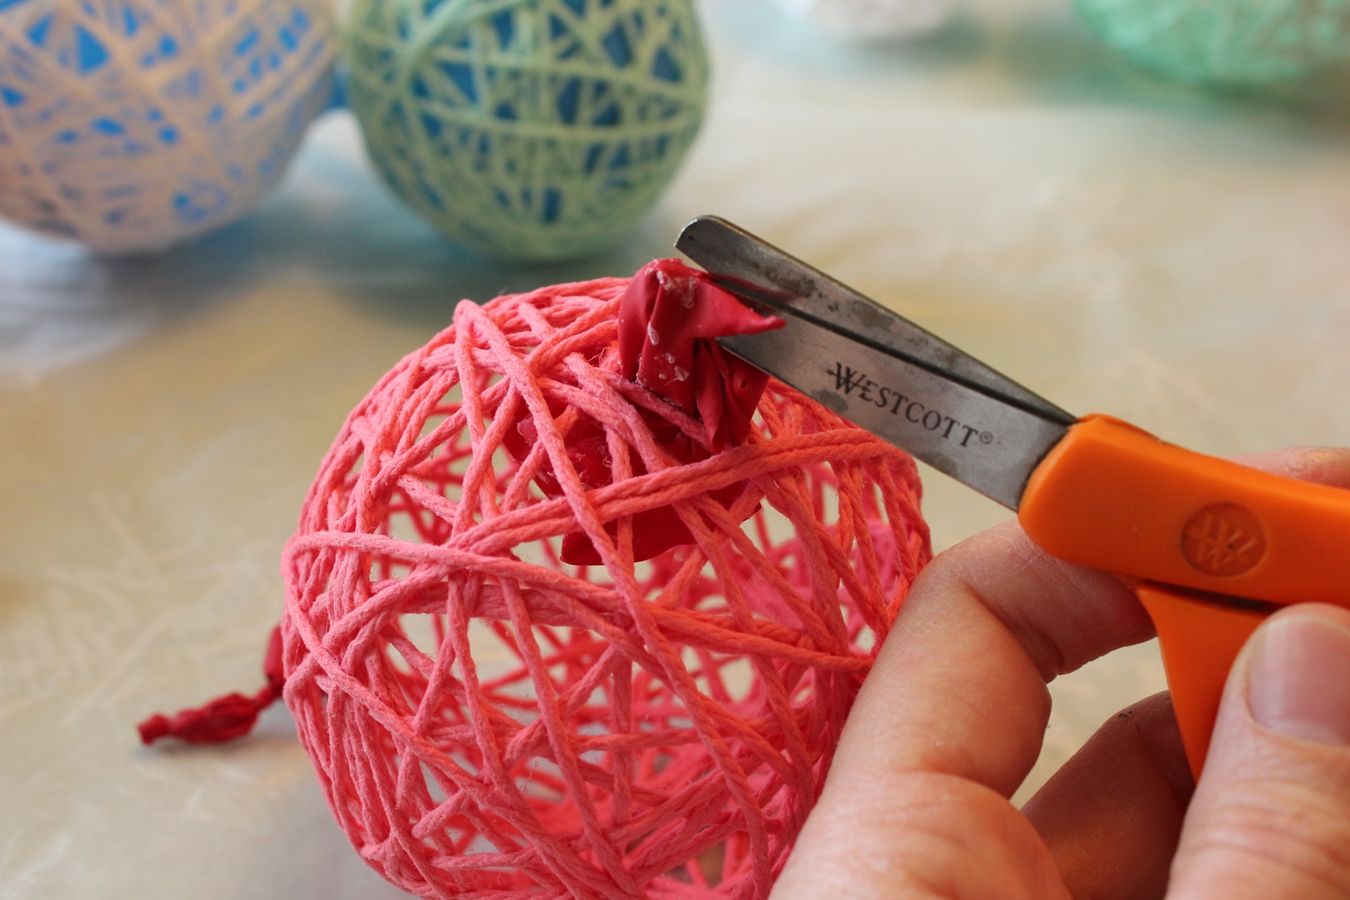
 Stride eight: When string is thoroughly dry, remove balloons. When string is dry, snip a hole in the balloon, being careful not to cutting your string. TIP: It is disquisitional that the strings exist completely dry earlier attempting to remove the balloons. (Example took 24 hours for completely drying fourth dimension.) If you try to remove the balloon while the string is fifty-fifty still damp, the exhaling airship will pull the clammy strings out of shape, and y'all will probably have to start all over.
 View in gallery
 Wait until airship has exhaled…
 View in gallery
 …and then carefully pull it out of the ball.
 View in gallery
 You're left with a beautiful brawl of string!
 View in gallery
 TIP: Avoid accidentally cutting off the entire balloon knot, or yous'll accept to get "fishing" for the residual of the balloon inside the ball. Which isn't as easy as it might seem, peculiarly if your holes are small.
 View in gallery
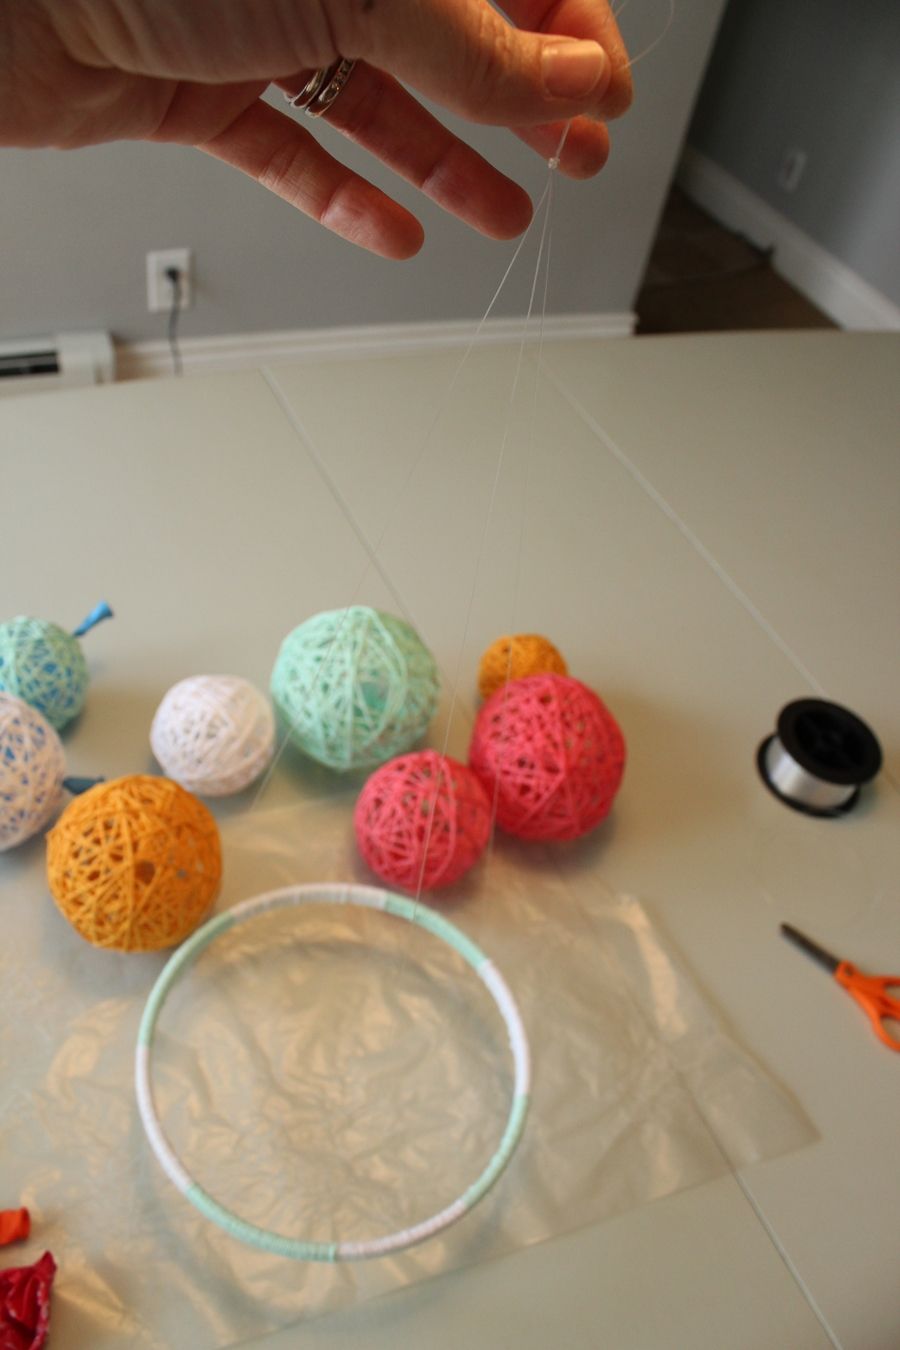
 Step 9: Tie fishing line to hang mobile. Y'all can opt to use extra string if you desire; this example shows fishing line. Tie fishing line to iii equidistant points on the mobile, using foursquare knots.
 View in gallery
 Knot the three fishing lines together, making sure each line is the same length so that the mobile will hang "flat" and evenly.
 View in gallery
 Step 10: Attach string balls to mobile hanger. Using a foursquare knot, attach the fishing line to the string ball.
 View in gallery
 TIP: Tie the angling knot almost the spot on your string ball where the balloon knot was, as this space typically has the largest gap in the string.
 View in gallery
 Determine how far down you want that item cord ball to hang from your mobile hanger, then tie off the other cease of the fishing line appropriately. Repeat this for other string balls as yous work your fashion effectually the mobile.
 View in gallery
 Step 11: Hang upwards the mobile and enjoy.
 View in gallery
 Don't you just beloved the uncomplicated, visual pop that this sweet mobile provides?
 View in gallery
 We hope you enjoy making your own customized version of this DIY mobile!
Source: https://www.homedit.com/diy-baby-mobile/
0 Response to "DIY Baby Mobile – A Cute and Versatile Project for a Nursery"
Post a Comment